

title: “Your first listing in 10 minutes” description: “A very simple, picture-led walkthrough that takes you from signing in to publishing your first Xlistr listing.” keywords: [“first listing”, “quick start”, “publish”, “add item”, “beginner”]
This is the gentlest way to start. We will add one item, check the details, and publish it to one marketplace. You do not need to understand the whole app first. If you get stuck at any point, stop and read the If something goes wrong section at the bottom. Nothing here is permanent until you press Publish or List item.What you need before you start
- Your Xlistr sign-in details.
- One marketplace account that you can sign in to, such as eBay, Vinted or Depop.
- 4 to 8 clear photos of one item.
- The item itself, so you can check the brand, size, condition and measurements.
- A rough idea of the postage. If you have a kitchen scale and a tape measure, even better.
Do not worry about getting everything perfect. You can save a draft, come back later, and change almost every detail before the listing goes live.
The words you will see
Step 1: Sign in
Go to app.xlistr.com/admin. Enter your email address and password, then click Sign in.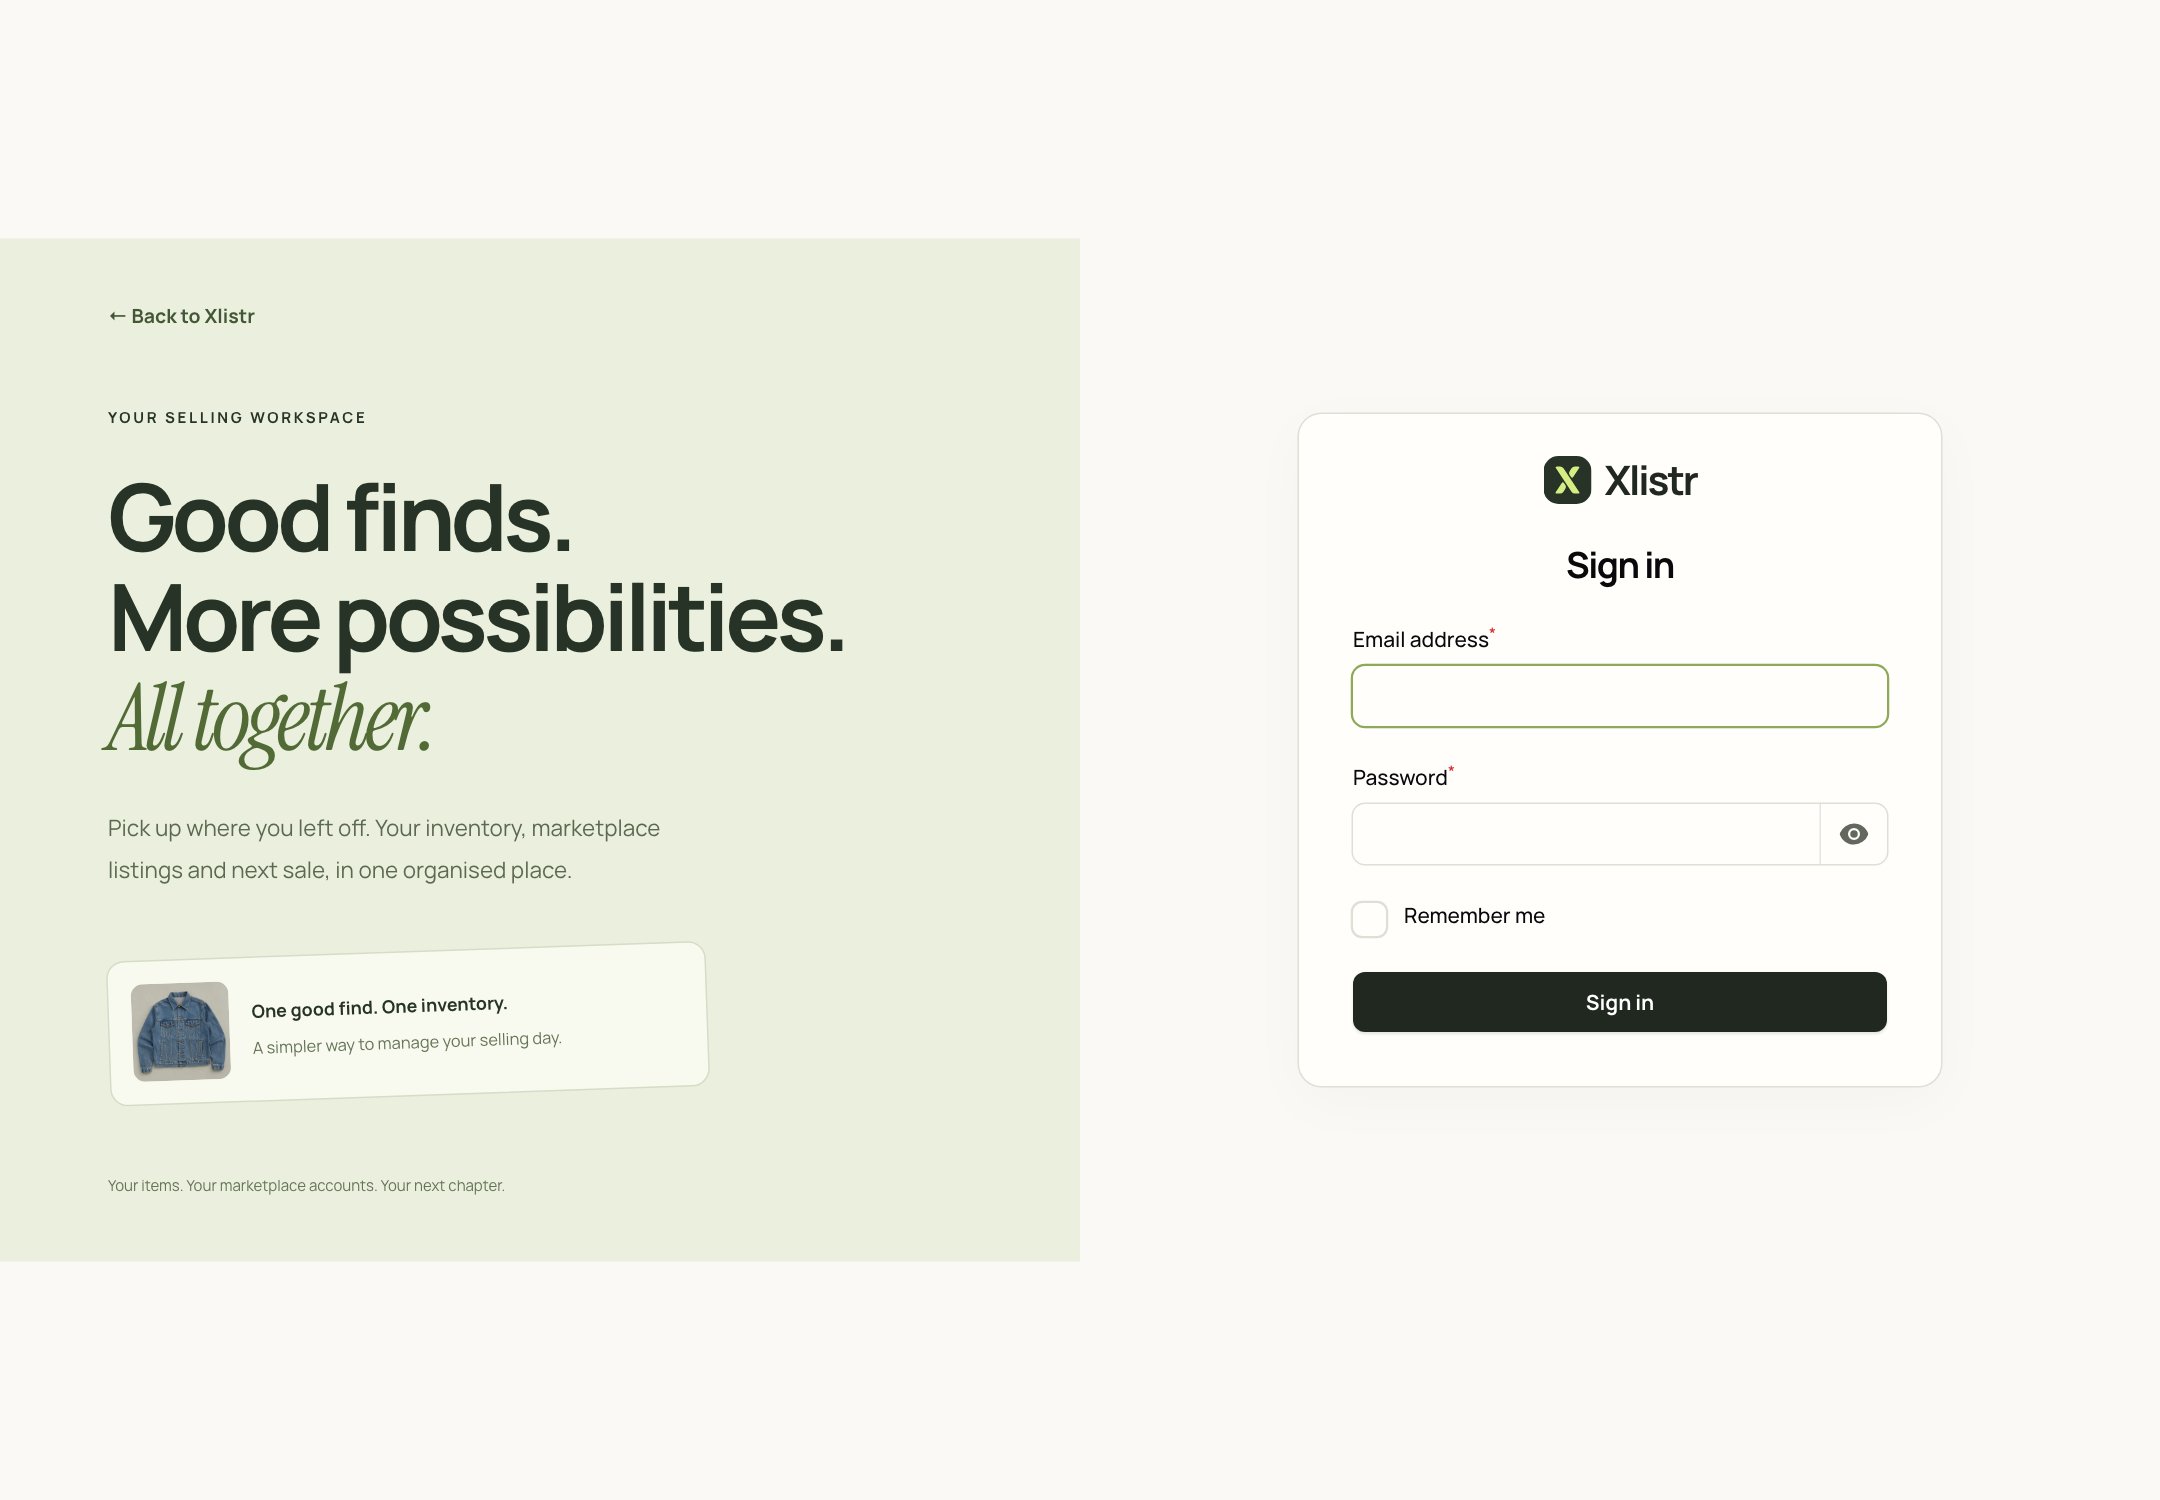
The Xlistr sign-in page. If your workspace uses Google sign-in, you will also see a Google button.
Step 2: Connect one marketplace
You only need one connection to start. You can add the rest later.- In the left-hand menu, click Automation.
- Scroll down to Shop integrations.
- Find the shop you use, such as eBay or Vinted.
- Click Connect and follow the instructions on screen.
- When you come back, the status should say Connected.
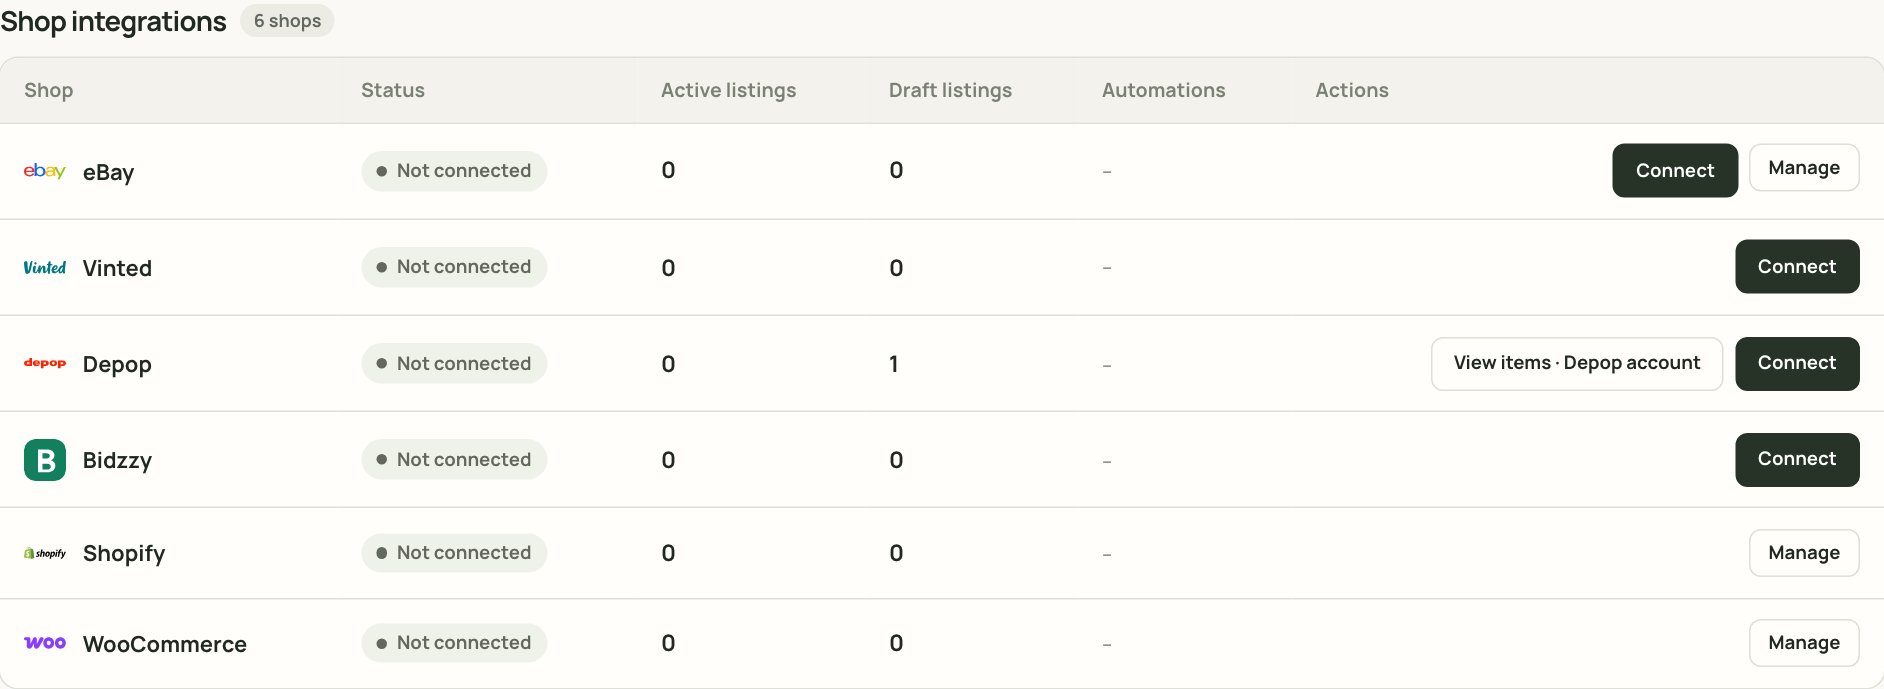
Shop integrations. In this sample workspace no shops are connected yet, so each row shows a Connect button.
Step 3: Click Add items
Near the top of the screen, click the dark Add items button. This is the main door for new stock.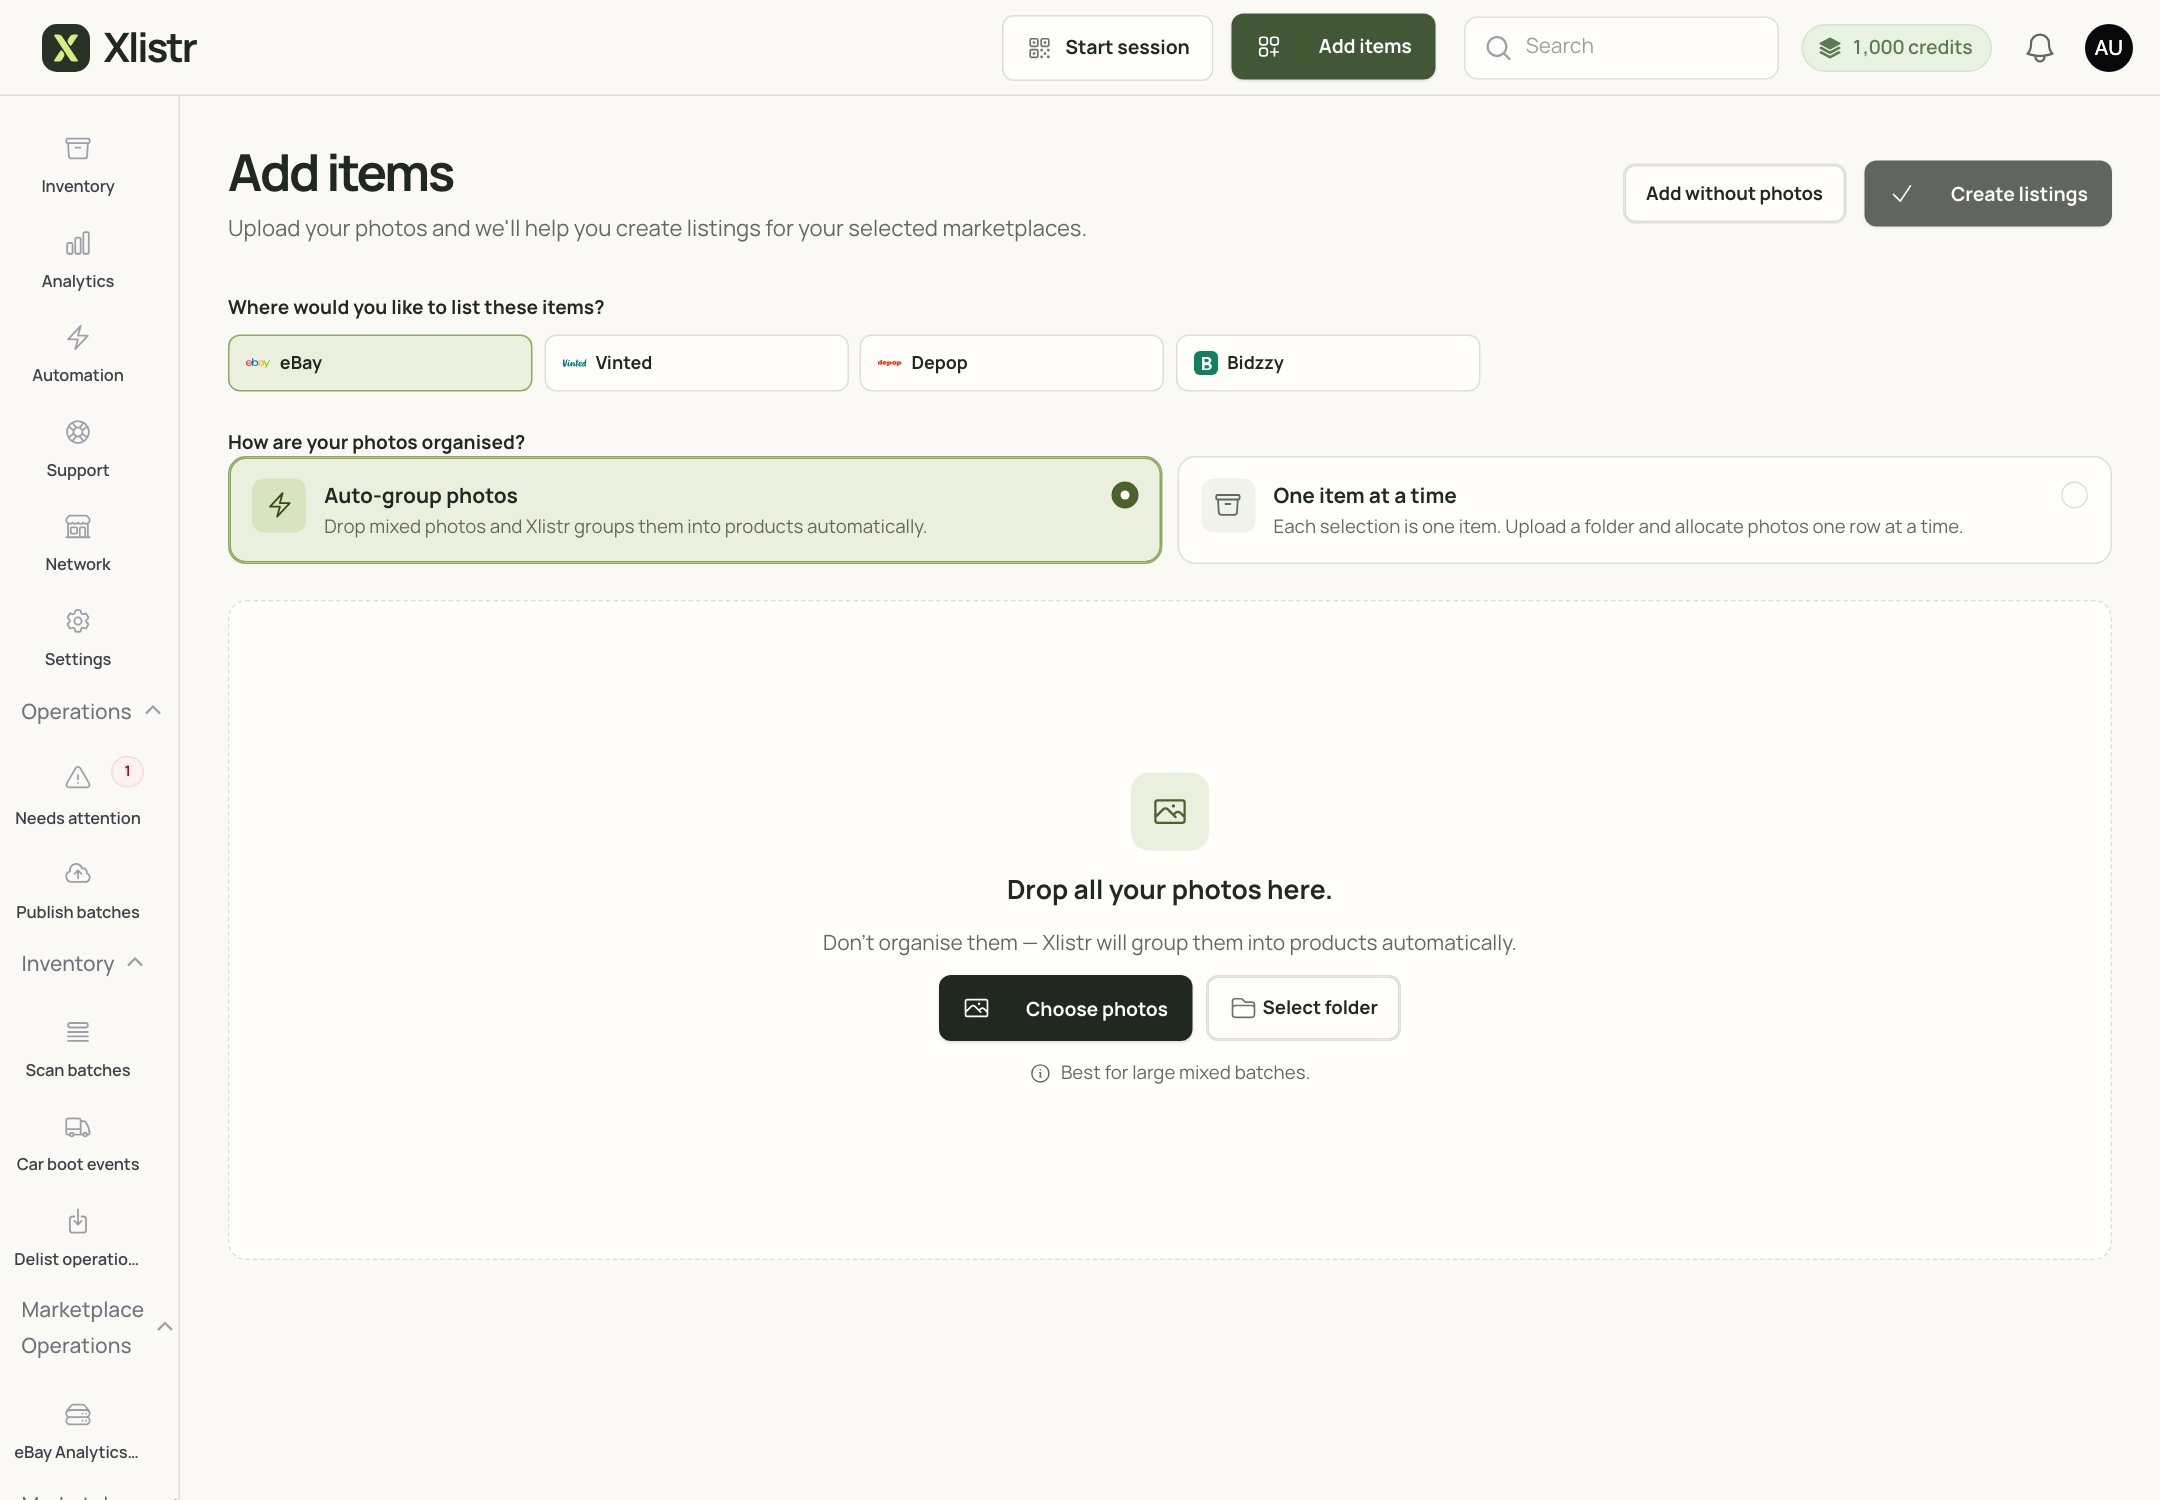
The Add items screen. Choose your marketplaces at the top, then choose how your photos are organised.
- Auto-group photos — best for a batch. Drop a pile of mixed photos and Xlistr tries to group them into items.
- One item at a time — best when you want to check each item as you go. Each selection is one item.
- Add without photos — starts a blank form. Use this when you want to type the details first and add photos later.
Step 4: Choose where to list
At the top of Add items, click the marketplaces you want to use. For your first try, choose just one. You can crosslist to the others later. The button shows how many marketplaces you have selected. If you choose four, the final button will say List item · 4.Step 5: Add photos and the shared details
Add your photos, then fill in the details that are true for the item itself. These details are shared by every marketplace listing.A simple photo checklist
- Front — the whole item, in focus.
- Back — show the shape.
- Label — brand, size and care label.
- Flaws — any marks, wear or missing buttons.
- Details — zips, buttons, soles, hallmarks or anything a buyer would ask about.
- Measurements — a tape measure in the photo helps, but write the numbers in the description too.
The fields, in plain English
Shared details are not the same as marketplace details. The title, category and description can be worded differently on each marketplace. Xlistr lets you review those separately in the next step.
Step 6: Review the listing before it goes live
When you open a marketplace listing, Xlistr shows a review screen. This is where you check the advert the buyer will actually see.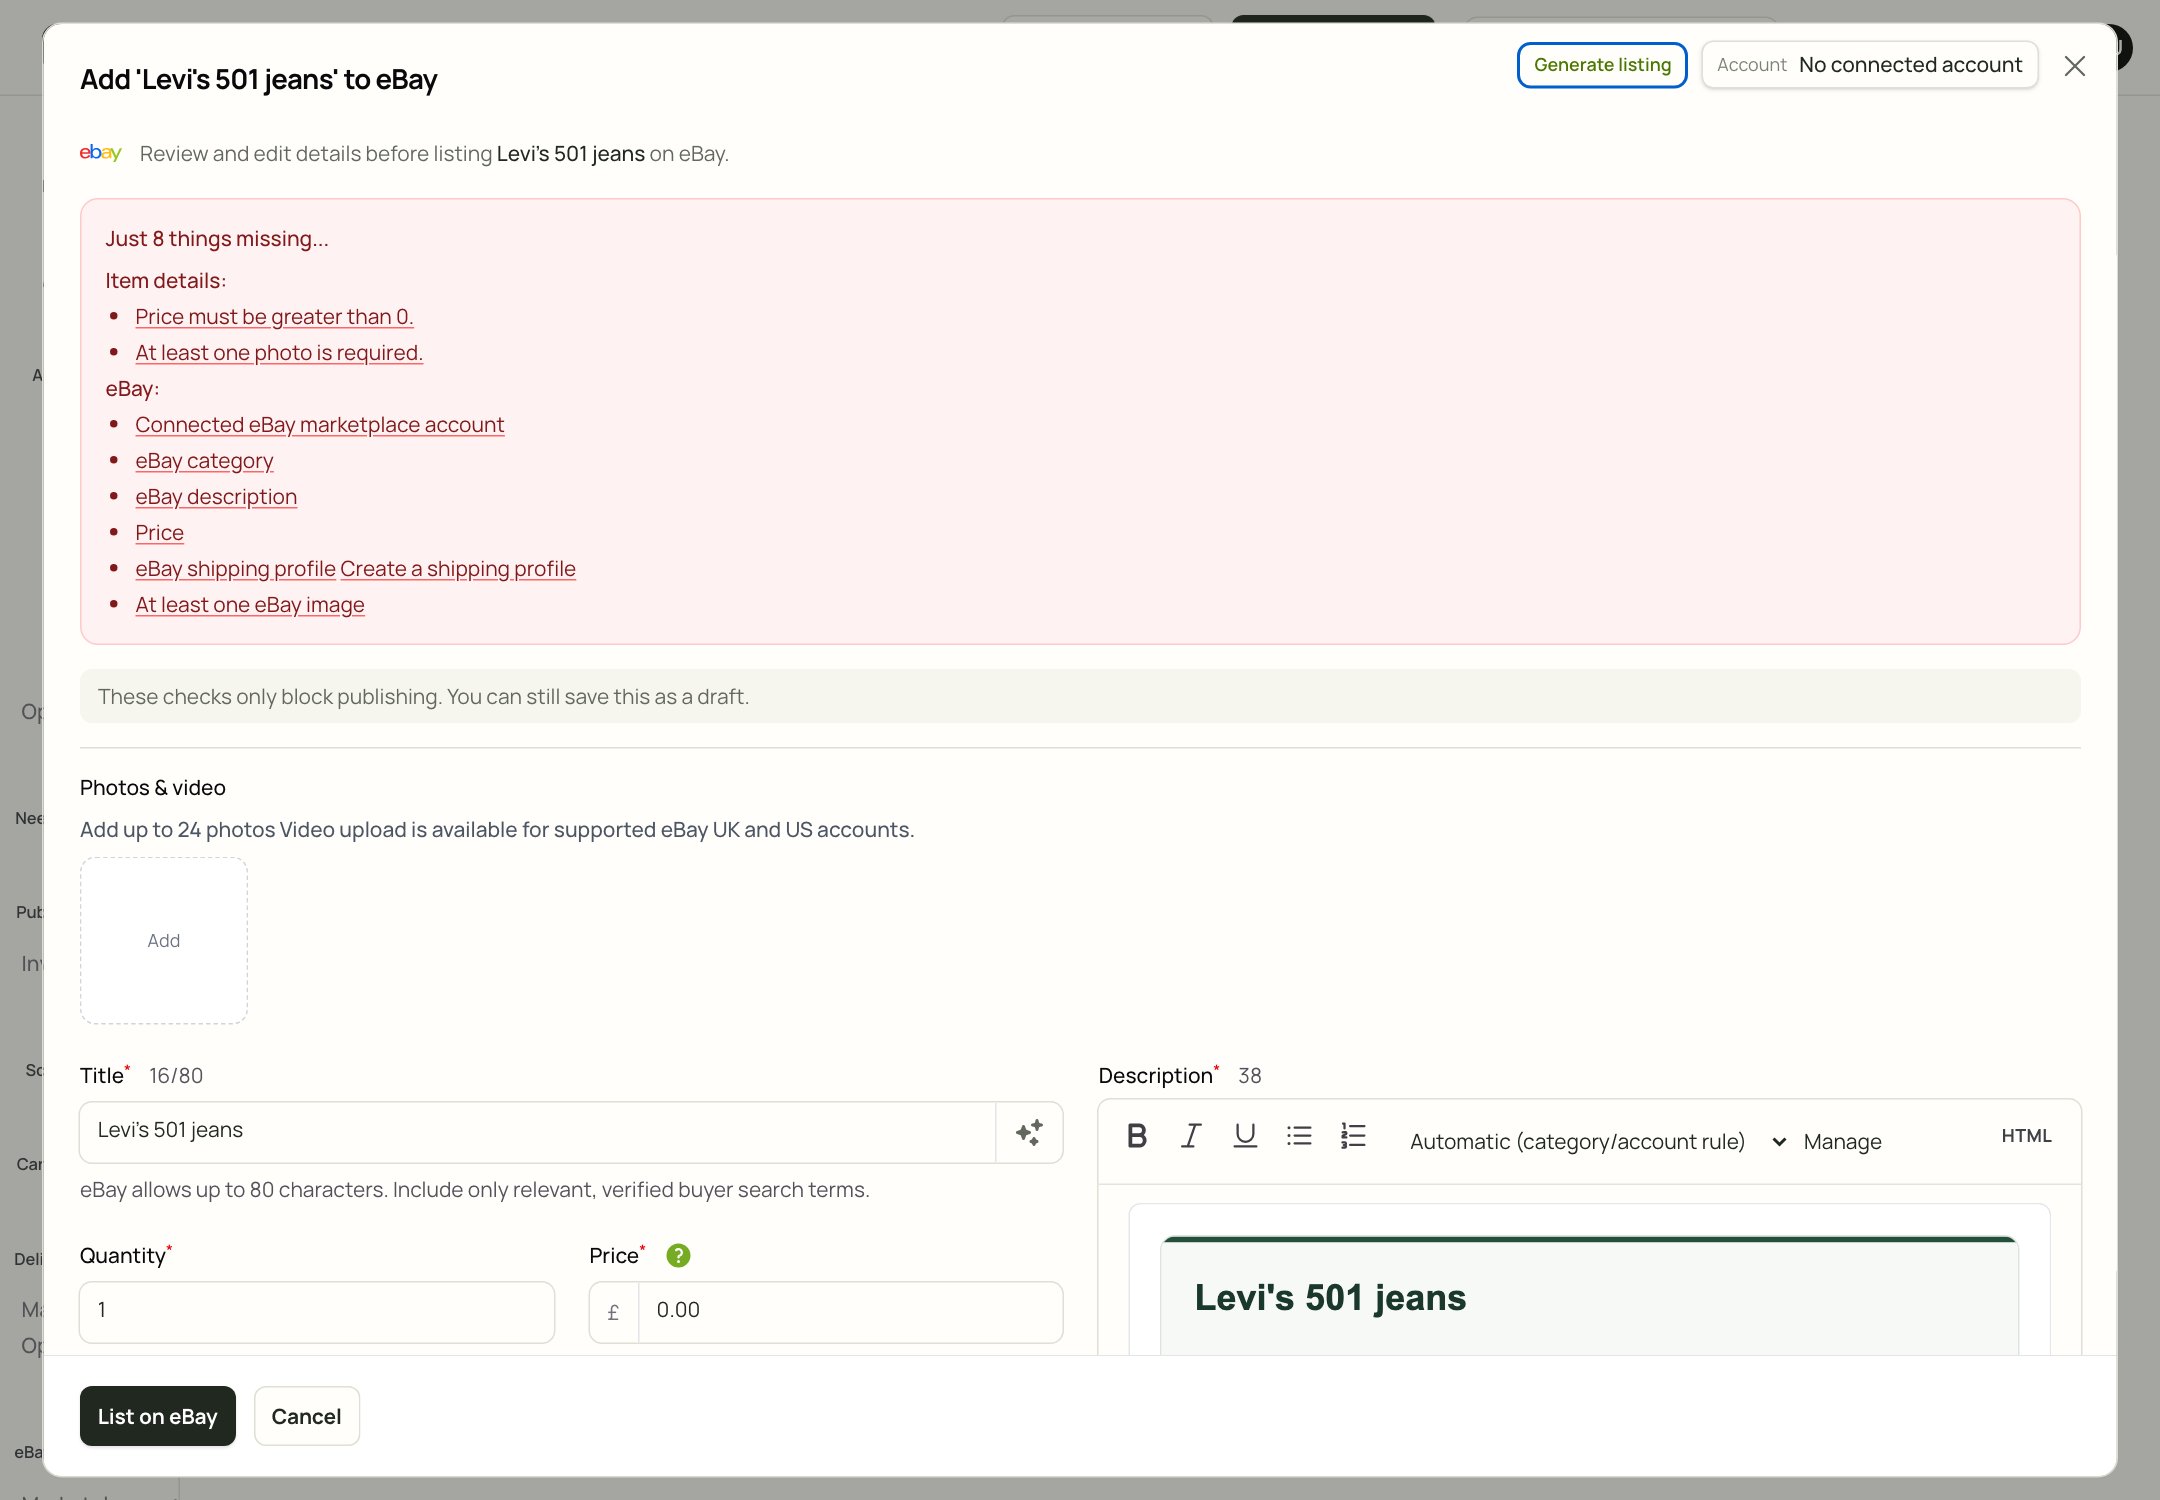
The eBay listing review screen. The red box lists anything that would stop publishing. You can still save a draft while you fix it.
- a price greater than zero;
- at least one photo;
- a connected marketplace account;
- a category;
- a description;
- a postage profile;
- a marketplace-specific image.
Check the title and description
- Keep the title clear and specific.
- Do not stuff it with keywords that are not true.
- Put the important words first: brand, item type, size, colour.
- Read the description out loud. If it sounds like a robot wrote it, rewrite it in your own words.
Check the category and item specifics
The category tells the marketplace where to show the item. Item specifics are the extra details buyers filter by, such as colour, material, style or shoe size. If the category is wrong, the required fields will be wrong too. Choose the most specific category that fits, then check the fields it asks for.Step 7: Add the parcel details
Scroll to Package details. This is where you tell Xlistr how the item will be posted.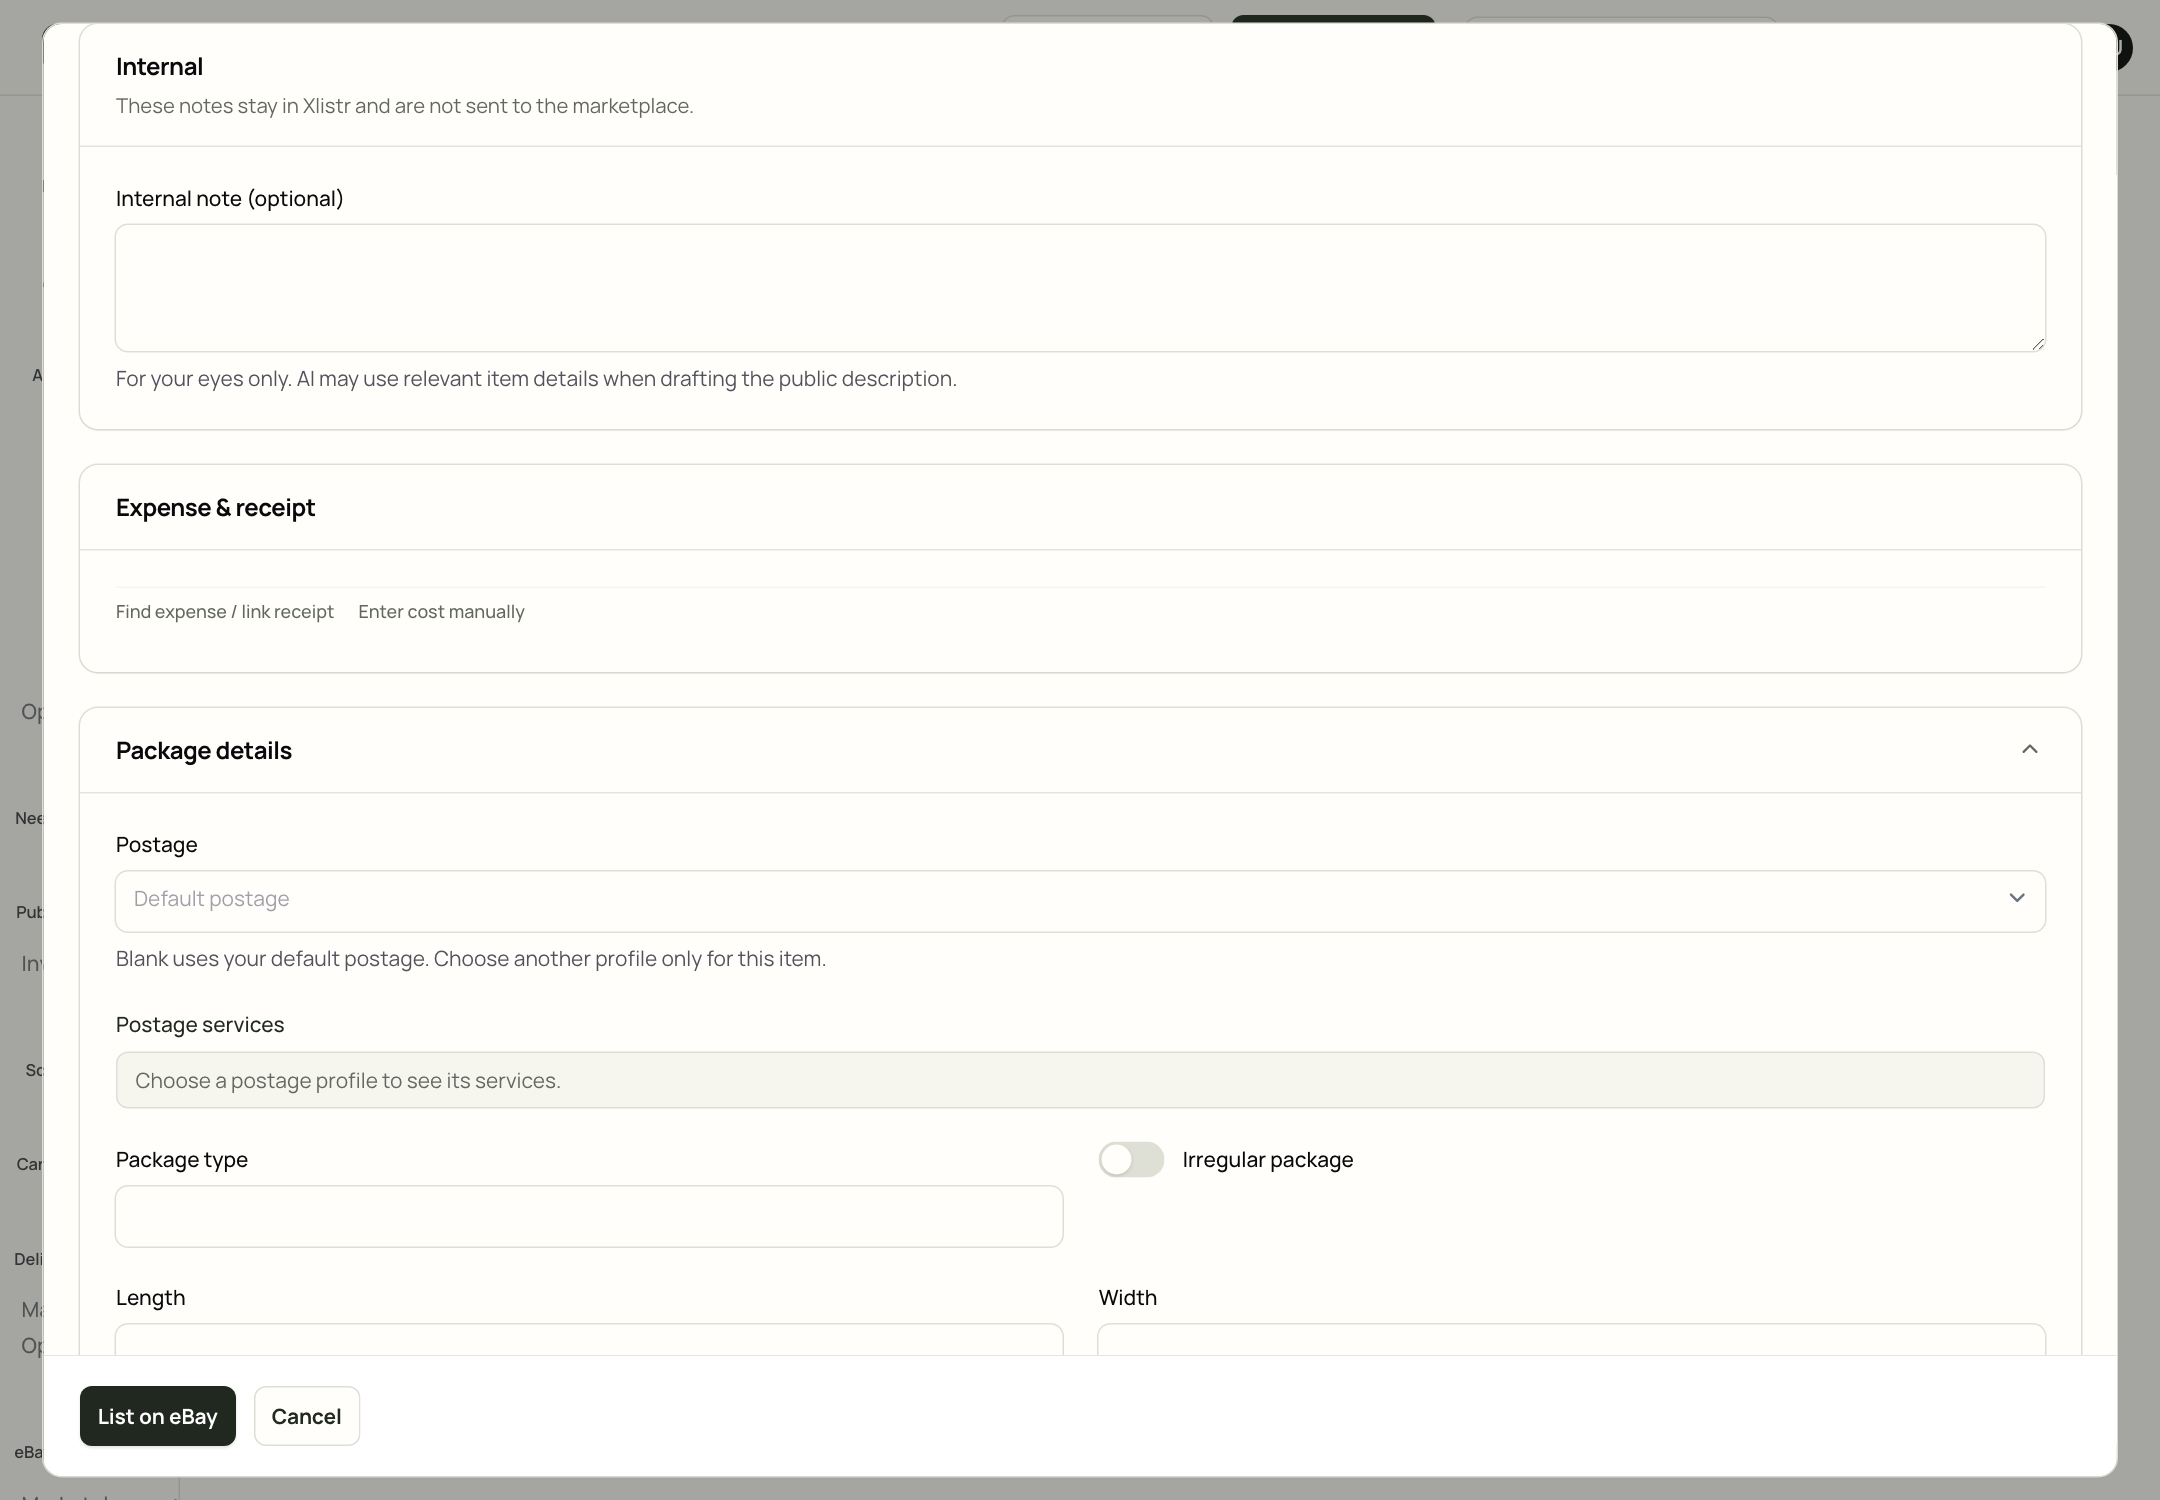
Package details inside the listing review screen. A saved postage profile fills in the services and parcel details for you.
- Postage — choose a saved profile if you have one. If you leave it blank, Xlistr uses your default.
- Package type — a box, a parcel bag, a large letter or an irregular package.
- Length, width, height and weight — measure the packed parcel, not the item on its own.
- Postage services — choose the service you will actually use.
Step 8: Save a draft, schedule, or publish
You now have three choices. They are not the same.
If you are not sure, choose Save as draft. Nothing is lost, and you can come back when you are ready.
“Queued” is not the same as “live”. Xlistr has accepted the job, but the marketplace may still be working on it. The item’s status will change when Xlistr receives the result.
Step 9: Check that it worked
- Open Inventory.
- Find your item and click its name.
- Look at the Marketplace Listings table.
- Check Publish status and Current sync status.
- For an important listing, open the marketplace itself and search for the item.
If something goes wrong
It says 'Waiting for the extension'
It says 'Waiting for the extension'
Chrome is not open, the extension is disabled, or you are signed in to the wrong Chrome profile. Open Chrome, check the extension, and sign in to the marketplace in the same profile. Then return to Xlistr and check whether the action resumes. See Install the Chrome extension.
It says a category or field is missing
It says a category or field is missing
Open the listing review screen and work through the red checklist. A missing category, item specific, image or postage profile will block publishing. Reconnecting the account will not fill in missing item details.
The connection says 'Needs reconnecting'
The connection says 'Needs reconnecting'
The marketplace sign-in has expired. Go to Automation > Shop integrations, find the shop and click Reconnect. For an extension shop, also check that Chrome is signed in to the right account.
The action timed out
The action timed out
Check the marketplace before you retry. A timeout can happen after the listing was created. If the listing is already there, do not publish again or you may create a duplicate.
The price will not save
The price will not save
The price must be greater than zero. If you genuinely want to list at zero, use a draft or a marketplace-side giveaway flow instead.
I cannot see my item in Inventory
I cannot see my item in Inventory
Clear the filters at the top of the Inventory page. Sold, archived and draft items can be hidden by the current view. The Inventory hub guide explains the views.
The one rule to remember
The inventory item owns the stock. Do not create a separate stock pool for every marketplace. If you do, the quantities will drift and you will sell the same item twice. When you are ready to list the same item somewhere else, use Crosslist or open the item and add another marketplace listing. The stock stays in one place.Next steps
Add your second marketplace
Connect Vinted, Depop or another shop and crosslist the same item.
Learn the inventory screen
Find items, understand the views, and see what each status means.
Set up postage properly
Save a parcel recipe so future listings are quicker and safer.
Fix a stuck listing
Work through connection, field, image and timeout errors.